Here is a quick demo of how it works with OKTA:
| Iframe | ||||||||||
|---|---|---|---|---|---|---|---|---|---|---|
|
As a first step, you need to add/create an app that supports SCIM on the OKTA side.
We used(for demo) SAML based new web app(please refer OKTA support/docs for more info):
As you can see it’s located under the Applications section on the OKTA side.
...
Then entered test data for SAML(it’s just for demo)
...
Then once you create your app make sure you selected SCIM support(at least in our case):
...
Then move to the provisioning tab and enter config data:
...
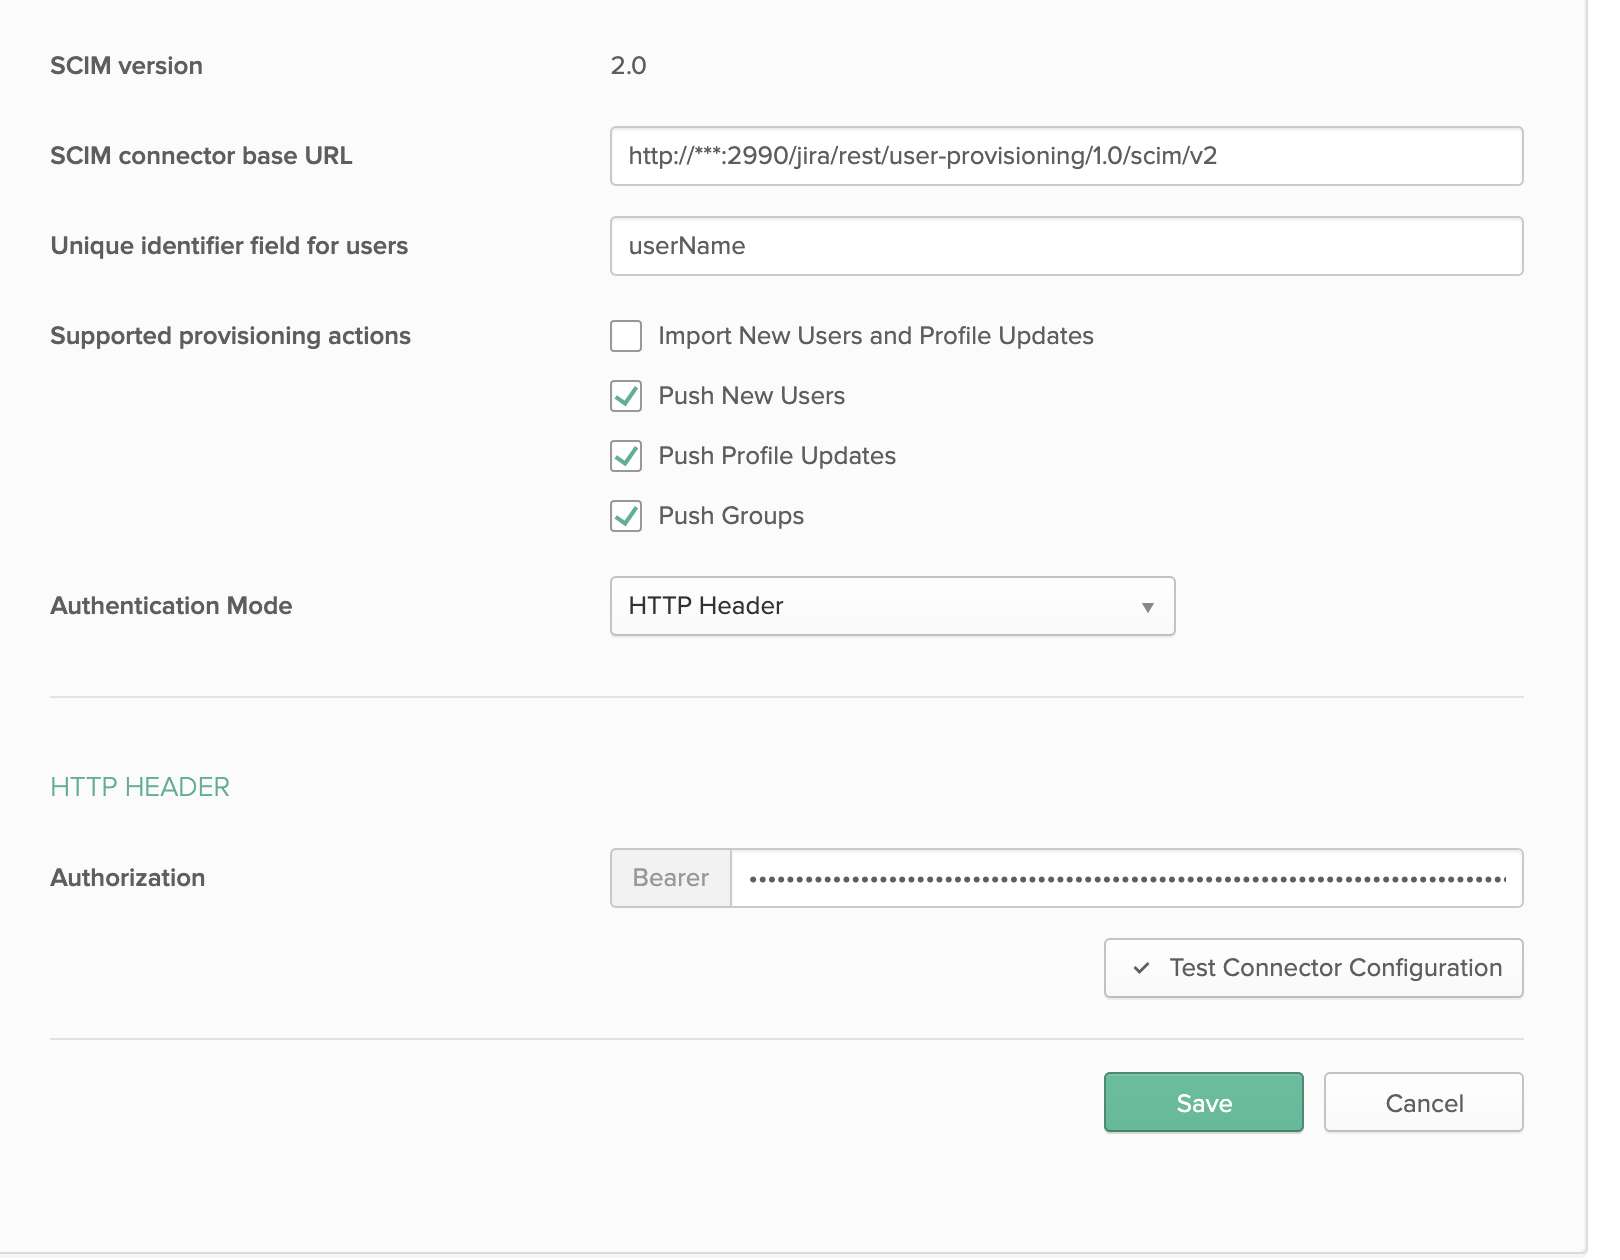
Please get SCIM API Url and Bearer token on the Jira/Confluence side, for example:
...
Please reduce the number of attributes for SCIM integration on the OKTA side, because Jira doesn’t support all of them:
...
Then you can assign users and groups to your app and see provisioning status.